How to take professional portraits? (Quick Answer for Beginners)
Professional portraits are created by combining five core elements: lighting, composition, camera settings, subject posing, and post-processing. A portrait looks “professional” when the subject is sharply focused, the lighting is intentional and balanced, the background supports the subject rather than distracting from it, and the final image tells a visual story.
In simple terms, amateur portraits often look flat, poorly lit, or randomly composed, while professional portraits feel polished, controlled, and emotionally engaging. Even with basic equipment, you can achieve professional results by understanding light direction, using the right lens (such as 50mm or 85mm), guiding natural expressions, and refining images during editing. This is the same approach used by professional studios like Pamela Photo Florida, where careful attention to lighting, posing, and post-processing consistently produces high-end, magazine-quality portrait results.
The entire process is about designing the image before and after the click, not just pressing the shutter.
What Makes a Portrait “Professional”?
A professional portrait is defined by both technical precision and emotional impact.
Key characteristics include:
- Sharp focus on the subject, especially the eyes
- Proper lighting balance with controlled highlights and shadows
- Intentional background selection that enhances the subject
- Controlled depth of field for subject separation
- Emotional expression that communicates personality or story
Beyond technical quality, consistency is also important. Professional photographers often maintain a recognizable editing style and visual identity, which strengthens branding and portfolio quality.
A professional portrait does not just show a face, it communicates identity, mood, and story.
Essential Equipment Needed for Professional Portraits
You don’t need expensive gear to start, but the right tools give you more control and consistency.
Cameras and Lenses
Both DSLR and mirrorless cameras are capable of producing professional portraits. Mirrorless cameras are generally preferred today due to better autofocus and portability.
Best portrait lenses:
- 50mm: Natural perspective, versatile for beginners
- 85mm: Classic portrait lens with flattering compression
- 35mm: Ideal for environmental portraits with background storytelling
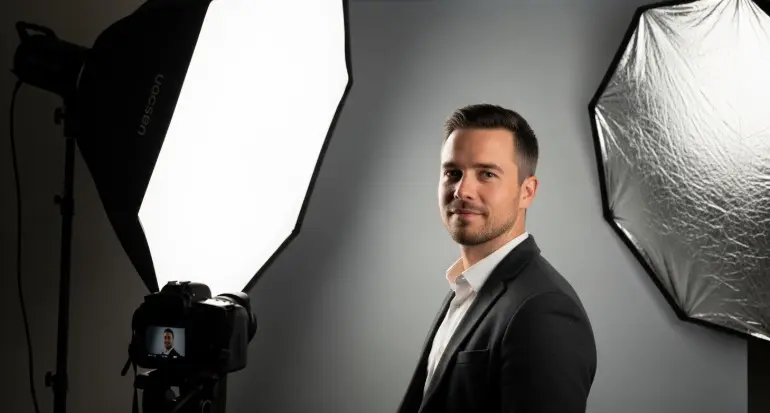
Lighting Gear
Lighting is the most important factor in portrait photography.
- Natural light: Soft, beginner-friendly, and widely accessible
- Softboxes: Create diffused, studio-quality lighting
- Reflectors: Fill shadows and balance exposure
- Ring lights: Popular for beauty and social media portraits
Backgrounds and Accessories
- Studio backdrops: Solid, gradient, or textured backgrounds
- Outdoor environments: Streets, parks, urban or natural scenes
- Props: Chairs, plants, books, or objects that add storytelling depth
Choosing between studio and environmental setups depends on whether you want control or narrative context.
How to take professional portraits? Step-by-Step Guide
Step 1 – Choose the Right Location or Setup
Decide between indoor and outdoor environments based on control and mood. Indoor setups offer full lighting control, while outdoor settings provide natural atmosphere and depth.
Check how light falls in the space before positioning your subject.
Step 2 – Set Up Proper Lighting
Lighting defines the mood of the portrait.
For studio setups:
- Key light for main illumination
- Fill light to reduce harsh shadows
- Back light for subject separation
For natural light:
- Use window light for soft, directional lighting
- Shoot during golden hour for warm tones
- Avoid harsh midday sunlight that creates strong shadows
Step 3 – Adjust Camera Settings
Proper settings ensure clarity and depth.
- Aperture: Use wide settings (f/1.8–f/4) for background blur
- ISO: Keep as low as possible for clean images
- Shutter speed: Fast enough to avoid motion blur
- Focus mode: Use eye autofocus or single-point focus
Step 4 – Guide Subject Posing
Natural posing makes a huge difference.
- Keep shoulders relaxed
- Slightly angle the body instead of facing straight forward
- Adjust chin position to avoid unflattering angles
- Encourage natural expressions instead of forced smiles
Small adjustments often create the biggest improvements.
Step 5 – Compose the Shot
Composition controls visual balance.
- Use the rule of thirds for natural framing
- Include leading lines or frames in the environment
- Use negative space to highlight the subject
Good composition guides the viewer’s attention naturally.
Step 6 – Capture Multiple Variations
Never rely on a single shot.
- Try different facial expressions
- Change angles (eye-level, low, high)
- Adjust distance from subject
- Capture candid moments between poses
Professional photographers often take dozens of frames for one final image.
Step 7 – Post-Processing and Editing
Editing refines the final look.
- Adjust exposure, contrast, and white balance
- Retouch skin naturally without over-smoothing
- Enhance colors while maintaining realism
- Use Lightroom or Photoshop for workflow efficiency
Editing should enhance the image, not transform it unnaturally.
Types of Professional Portrait Photography
| Type | Purpose | Best Use Case | Lighting Style |
|---|---|---|---|
| Studio Portrait | Controlled branding | Business headshots | Artificial soft light |
| Environmental Portrait | Storytelling | Lifestyle branding | Natural light |
| Corporate Headshot | Professional identity | LinkedIn, CV | Soft even lighting |
| Creative Portrait | Artistic expression | Portfolio work | Mixed lighting |
| Candid Portrait | Natural emotion | Social media | Available light |
Each type requires different lighting, posing, and composition approaches.
Common Mistakes to Avoid in Portrait Photography
- Poor or uneven lighting setup
- Using incorrect focal length causing distortion
- Over-editing skin leading to unnatural results
- Distracting or cluttered backgrounds
- Stiff or unnatural posing
Avoiding these mistakes instantly improves image quality.
Pro Tips to Elevate Your Portrait Photography
- Add catchlights in eyes to bring life to portraits
- Use layered backgrounds to create depth
- Focus on emotion rather than perfect posing
- Separate subject from background using lighting and distance
- Always shoot in RAW for maximum editing flexibility
These techniques help elevate your work from basic to professional.
FAQs About How to take professional portraits?
What is the best camera for professional portraits?
Any camera with manual controls works, but mirrorless and DSLR cameras with strong autofocus systems are preferred.
Can I take professional portraits with a smartphone?
Yes, modern smartphones can produce high-quality portraits, especially with portrait mode and good lighting.
What lighting is best for portrait photography?
Soft, diffused lighting—such as window light or softboxes—is ideal for flattering results.
How do I make my portraits look more natural?
Use relaxed posing, avoid over-directing, and capture candid moments between poses.
What lens is ideal for portraits?
The 85mm lens is considered the best for portraits, followed by 50mm for versatility.
How important is editing in portrait photography?
Editing is essential for refining color, exposure, and detail, but it should remain natural and subtle.
How do I pose clients for professional portraits?
Guide small adjustments such as head tilt, shoulder angle, and hand placement rather than rigid poses.
What background is best for portraits?
Simple, clean, and non-distracting backgrounds that support the subject work best.
Final Thoughts on How to take professional portraits?
Taking professional portraits is a combination of technical skill and creative direction. The foundation always comes down to five pillars: lighting, posing, camera settings, composition, and editing.
Once you understand how these elements work together, you can create high-quality portraits in any environment, even with minimal gear. The real improvement comes through practice, experimentation, and developing a consistent visual style.
Professional portrait photography is not about expensive equipment, it’s about understanding light, people, and storytelling through images.